When your home or business relies on a 20 kW generator, it's more than just a piece of equipment—it's your guardian against outages, a silent promise of uninterrupted power. But like any vital system, it needs consistent attention to perform flawlessly when you need it most. Diving into "Maintaining Your 20 kW Generator: Tips & Troubleshooting" isn't just about ticking boxes; it's about extending its lifespan, maximizing efficiency, and ensuring reliable power during those critical times.
Think of generator maintenance not as a chore, but as an investment in peace of mind. Regular care significantly reduces the likelihood of costly emergency repairs and gives you confidence that your power source is always ready for action.
At a Glance: Your Generator Maintenance Blueprint
- Daily & Weekly Checks: Quick inspections of oil, coolant, and battery terminals to catch obvious issues early.
- Monthly Must-Dos: Deeper dives into air and fuel filters, plus battery charge tests, to maintain efficiency.
- Annual Rituals: Professional servicing, oil/filter changes, spark plug checks, and coolant flushes for comprehensive system health.
- Troubleshooting Basics: Learn how to tackle common problems like a generator that won't start or power fluctuations.
- Advanced Care: Understand seasonal adjustments and proper long-term storage to protect your investment.
- When to Call a Pro: Recognize complex electrical issues or persistent problems that require expert intervention.
Why Your 20 kW Generator Deserves VIP Treatment
A 20 kW generator is a robust machine, built to handle significant loads. But even the best equipment isn't set-it-and-forget-it. Neglecting it can lead to frustrating failures, reduced efficiency, and a significantly shortened lifespan. Picture this: a storm hits, the grid goes down, and your generator sputters to life for a moment before dying. That's the nightmare scenario consistent maintenance is designed to prevent.
Certified generator technician Mark Thompson emphasizes this point: "Consistent maintenance, including monitoring oil levels and ensuring clean fuel intake, prevents the majority of generator failures." This isn't just a suggestion; it's a fundamental truth for keeping your generator operating at peak performance. Think of it as preventative medicine for your power source, stopping small issues from becoming catastrophic breakdowns.
The Lifeline of Longevity: Your Routine Maintenance Schedule
A well-structured maintenance schedule is your generator's best friend. It helps you catch minor issues before they escalate, ensures peak efficiency, and saves you from the headache and expense of unexpected repairs. Here’s a breakdown of what you should be doing and when.
Daily & Weekly: The Quick Checks
These are your frontline defenses—fast, easy checks that can prevent significant problems. They focus on the basics that keep your generator from overheating or struggling to start.
- Oil Level Check: Just like your car, your generator needs adequate oil. Check the dipstick to ensure the oil level is within the recommended range. Low oil can quickly lead to engine damage.
- Coolant Level Inspection: If your generator is liquid-cooled, verify that the coolant reservoir is filled to the proper mark. Coolant prevents overheating, which is a common cause of generator failure.
- Battery Inspection (Visual): Take a quick look at your battery terminals. Are they clean? Are the connections tight? Corrosion can prevent your generator from starting when you need it most.
- Fuel Level Verification: Ensure you have enough fuel in the tank, especially if an outage is imminent or expected. Running out of fuel unexpectedly can cause air pockets in the fuel lines, requiring a bleed procedure.
Monthly Must-Dos: Deeper Dives
Once a month, it's time to go a bit deeper, addressing components that affect efficiency and starting reliability.
- Air Filter Inspection & Cleaning: The air filter protects your engine from dust and debris, ensuring clean airflow for combustion. Remove the filter and inspect it for dirt or blockages. If it's lightly soiled, you can often clean it with compressed air. If it's heavily clogged or damaged, it's time for a replacement. A clean air filter improves efficiency and reduces fuel consumption.
- Fuel Filter Replacement: Over time, fuel filters can collect sediment and contaminants, restricting fuel flow. Replace the fuel filter according to your manufacturer's guidelines (or monthly, depending on usage/environment) to maintain a clean, steady fuel supply to the engine. This is crucial for consistent performance.
- Battery Charge Level Test: Use a battery tester to check the voltage output. Ensure your battery charger (if integrated) is functioning correctly and maintaining the battery's charge. A weak battery is a primary reason generators fail to start.
- Generator Exercise: Run your generator under a load (even a small one, like a few lights) for about 30 minutes. This helps lubricate engine components, keeps the battery charged, and ensures all systems are operational.
Annual Rituals: Professional Expertise & Core Component Care
Once a year, it's wise to bring in the pros for a thorough check-up. This annual service addresses the more complex aspects of generator health and ensures its long-term reliability. Professional generator service technician Michael Stevens advises that "adherence to this schedule is key to avoiding costly repairs and ensuring readiness."
- Professional Inspection & Servicing: Have a certified technician perform a comprehensive inspection of all mechanical and electrical systems. They can identify subtle issues you might miss and perform necessary adjustments or calibrations.
- Oil & Oil Filter Change: Even if your generator hasn't seen heavy use, oil degrades over time. Annually change the engine oil and replace the oil filter. Always use the specified oil type and amount as per your manual.
- Spark Plug Inspection & Replacement: Remove the spark plugs, inspect them for wear, fouling, or damage. Clean them if they're lightly soiled, or replace them if they're worn down or heavily carbonized. Fresh spark plugs ensure efficient ignition.
- Coolant System Flush: Over time, sediment and corrosion can build up in the cooling system. A coolant flush removes these contaminants, ensuring optimal cooling efficiency and preventing overheating.
- Valve Clearance Check: This is typically a technician's job. Correct valve clearance is critical for engine performance and longevity.
Hands-On Power: Step-by-Step Maintenance Procedures
While some tasks are best left to professionals, many routine maintenance procedures are well within the grasp of a diligent generator owner. Here's how to tackle some of the most common tasks.
Oil Change Mastery
Changing your generator's oil is fundamental for engine health. It’s a straightforward process, but requires attention to detail.
What you'll need:
- New engine oil (specified type and amount)
- New oil filter
- Oil drain pan
- Wrenches (for drain plug and oil filter)
- Funnel
- Rags
- Gloves
The Process:
- Warm the Engine: Run the generator for 5-10 minutes to warm the oil. Warm oil drains more completely and carries more contaminants with it. Then, shut it down.
- Position the Drain Pan: Place the oil drain pan directly beneath the engine's oil drain plug.
- Drain the Old Oil: Carefully remove the oil drain plug. Allow all the old oil to drain into the pan. This might take several minutes.
- Remove the Old Filter: Once the oil has drained, position the pan under the oil filter. Use an oil filter wrench to loosen and remove the old filter. Be prepared for a small amount of oil to spill out.
- Prepare the New Filter: Apply a thin film of new oil to the rubber gasket of the new oil filter. This ensures a good seal and makes future removal easier.
- Install the New Filter: Screw the new oil filter onto the engine by hand until the gasket makes contact. Then, tighten it an additional 1/4 to 1/2 turn (consult your manual for exact specifications). Do not overtighten.
- Replace the Drain Plug: Reinstall the oil drain plug, ensuring it's securely tightened (again, avoid overtightening).
- Refill with New Oil: Using a funnel, slowly add the specified type and amount of new engine oil into the oil fill port.
- Check the Dipstick: After adding the oil, wait a few minutes for it to settle, then check the dipstick. Add more oil if needed until the level is within the recommended range.
- Final Checks: Start the generator and let it run briefly. Check for any leaks around the drain plug or oil filter. Ensure the oil pressure indicator (if present) shows normal pressure. Shut it down and recheck the oil level, topping off if necessary.
Battery Brilliance
Your battery is the heart of your generator's starting system. Keeping it in top condition is non-negotiable.
What you'll need:
- Battery tester (voltmeter)
- Wire brush or battery terminal cleaner
- Baking soda and water solution (for corrosion)
- Wrenches (for terminals)
- Gloves and eye protection
The Process:
- Test Voltage Output: Use a battery tester to check the voltage. It should typically read around 12.6 volts when fully charged and not under load. Compare your reading against the specifications in your generator's manual.
- Inspect for Corrosion: Look for white or blue powdery buildup on the battery terminals. This is corrosion and can impede electrical flow.
- Clean Terminals: If corrosion is present, disconnect the battery terminals (negative first, then positive). Mix a paste of baking soda and water and apply it to the corroded areas. Use a wire brush to scrub away the corrosion until the terminals are shiny. Rinse with clean water and dry thoroughly.
- Tighten Connections: Reconnect the battery terminals (positive first, then negative), ensuring they are clean and tightly secured. Loose connections are a common cause of starting issues.
- Check Water Levels (if applicable): For flood-cell batteries, check the electrolyte levels and top up with distilled water if needed. Maintenance-free batteries do not require this.
- Replace if Necessary: If the battery consistently fails to hold a charge, shows signs of damage (bulging, cracking), or is beyond its typical lifespan (usually 3-5 years), replace it with a battery that matches the original specifications.
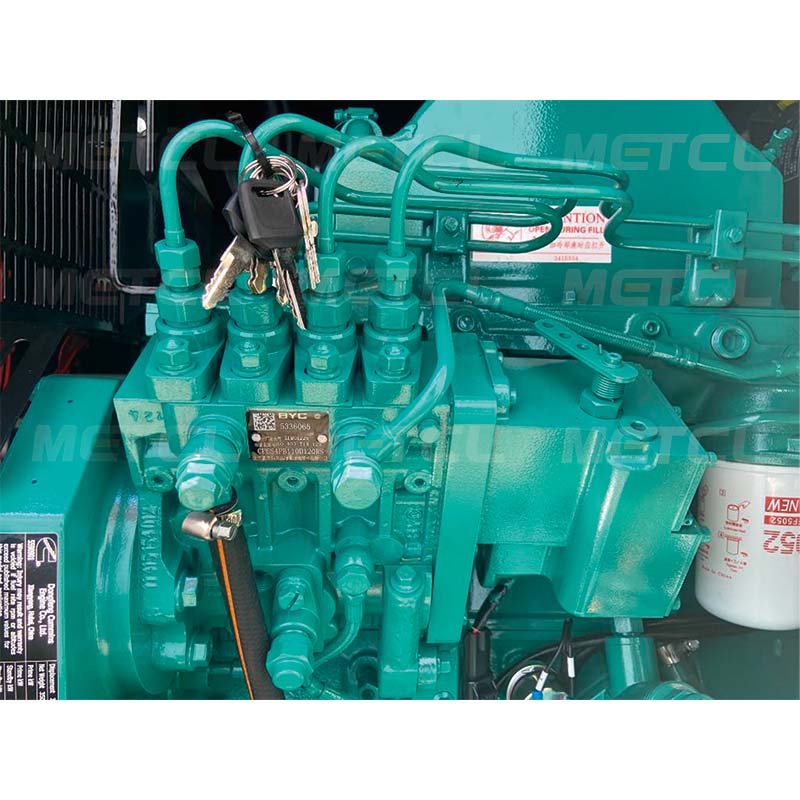
Breathing Easy & Fueling Smart: Air & Fuel Filter Care
These filters are vital for your engine's performance and longevity, ensuring it gets clean air and fuel. Industry expert John Roberts notes that "these regular tasks ensure efficient and safe generator operation, reducing failure risk."
Air Filter Maintenance:
- Locate the Air Filter: Consult your manual to find the air filter housing.
- Remove and Inspect: Open the housing and carefully remove the air filter element. Hold it up to a light source. If you can see light through it, it's likely still good. If it's dark, clogged with debris, or torn, it needs cleaning or replacement.
- Clean or Replace: If lightly soiled, you can gently tap it to dislodge loose debris or use compressed air (from the inside out) to clean it. If heavily soiled, saturated with oil, or damaged, replace it with a new one.
- Reinstall: Ensure the new or cleaned filter is properly seated in the housing and secure the cover.
Fuel Filter Maintenance: - Locate the Fuel Filter: Your generator likely has an inline fuel filter between the fuel tank and the engine.
- Prepare for Replacement: Place a rag or small container underneath the filter to catch any spilled fuel. Ensure the generator is off and cooled.
- Remove the Old Filter: Carefully loosen the clamps on either side of the fuel filter and disconnect the fuel lines. Note the direction of fuel flow (there's usually an arrow on the filter) before removing it.
- Install the New Filter: Install the new fuel filter, ensuring it's oriented correctly with the fuel flow arrow pointing towards the engine. Reconnect the fuel lines and tighten the clamps securely.
- Check for Leaks: Start the generator and carefully check for any fuel leaks around the new filter and connections.
When Things Go Sideways: Troubleshooting Common Generator Issues
Even with diligent maintenance, issues can sometimes arise. Knowing how to diagnose common problems can save you time and potentially prevent a service call.
Silence is Not Golden: My Generator Won’t Start
This is perhaps the most frustrating issue, but often has a simple solution.
- Check the Battery: Is it fully charged? Are the terminals clean and tight? A weak or corroded battery is the most common culprit for a no-start condition.
- Verify Fuel Supply: Is there enough fuel in the tank? Is the fuel valve open? Check the fuel lines for any visible kinks or clogs. Old or stale fuel can also cause starting issues. If your generator has a primer bulb, try priming it.
- Inspect Spark Plugs: Remove the spark plugs. Are they dirty, fouled with carbon, or wet with fuel? Clean them with a wire brush or replace them if they are heavily worn or damaged.
- Ignition System: Ensure the ignition switch is in the "On" position. Check the emergency stop button if your generator has one, ensuring it hasn't been accidentally pressed.
- Oil Sensor: Many generators have a low-oil shutdown sensor. If your oil level is too low, the generator will prevent starting to protect the engine.
The Power Rollercoaster: Fluctuations in Output
If your generator starts but the power it provides isn't stable, it could indicate a few different problems.
- Check the Load: Is the total load on the generator balanced and within its rated capacity? Overloading can cause voltage drops and unstable output. Try disconnecting some appliances to see if the problem resolves.
- Inspect the Voltage Regulator: The automatic voltage regulator (AVR) manages the output voltage. A faulty AVR can cause significant fluctuations. This often requires professional diagnosis and replacement.
- Fuel Quality/Delivery: Inconsistent fuel flow or poor fuel quality can also lead to engine RPM fluctuations, which in turn affect power output. Ensure your fuel is fresh and the fuel filter is clean.
- Engine RPM: Use a tachometer if you have one, or listen carefully to the engine. If the RPMs are surging or dropping, this indicates an engine problem that will affect power output.
Knowing When to Call in the Cavalry: Professional Help
While basic troubleshooting is empowering, there are times when professional intervention is not just recommended, but essential. Dr. Emily Watson emphasizes that "addressing issues promptly extends generator life, and professional involvement is crucial for complex problems."
When to contact a certified technician:
- Persistent No-Start Issues: If you've checked the battery, fuel, and spark plugs, and your generator still won't start.
- Complex Electrical Problems: If you suspect issues with the alternator, control board, wiring, or voltage regulator. These components require specialized knowledge and tools for diagnosis and repair.
- Consistent Power Output Fluctuations: If load management and basic checks don't resolve unstable power.
- Unusual Noises, Smells, or Vibrations: Any new or worsening mechanical sounds, burning smells, or excessive vibration indicates a deeper issue that needs expert assessment.
- Error Codes: If your generator displays error codes that you can't interpret or resolve with your manual.
- After Significant Damage: Following a flood, fire, or severe impact.
Remember, attempting complex repairs without the proper expertise can lead to further damage, safety hazards, or void your warranty.
Beyond the Basics: Advanced Care for Peak Performance
To truly maximize your generator's lifespan and ensure year-round reliability, consider these advanced maintenance tips that go beyond the routine.
Weathering the Storms: Seasonal Adjustments
Your generator operates in a dynamic environment, and adapting your care based on the season is smart.
- Winter Preparedness:
- Cold Weather Kit: If you live in a region with freezing temperatures, consider installing a cold weather kit. This typically includes a battery warmer (to ensure reliable starts in frigid conditions) and an oil heater (to keep the oil flowing smoothly).
- Fuel Stabilizer: During winter, if your generator runs less frequently, adding fuel stabilizer to the tank helps prevent fuel degradation.
- Block Heater: Some larger 20 kW units may benefit from an engine block heater, similar to those used in diesel trucks, to ensure easier cold starts.
- Summer Heat Management:
- Cooling System Vigilance: During hot spells, pay extra attention to your cooling system. Check coolant levels more frequently and ensure the radiator fins are free of debris (leaves, dust, insect nests) that could impede airflow.
- Ventilation: Ensure the generator's enclosure (if applicable) has adequate ventilation to prevent heat buildup, especially during extended operation.
Hibernation Hacks: Preparing for Long-Term Storage
If you anticipate not using your generator for an extended period (e.g., several months or more), proper storage is crucial to prevent component degradation. Senior Engineer Susan Li confirms these practices "protect components and ensure operational readiness" when you eventually need it.
- Fuel Management:
- Full Tank with Stabilizer: Fill the fuel tank completely and add a high-quality fuel stabilizer. Run the generator for 10-15 minutes to circulate the stabilized fuel through the carburetor and fuel lines. This prevents fuel from breaking down, gumming up the system, or causing corrosion.
- Alternatively, Drain Fuel: If you prefer, you can completely drain the fuel tank and run the generator until it runs out of fuel. This ensures no stale fuel is left in the system. Check your manual for the recommended method.
- Battery Care: Disconnect and remove the battery. Clean it thoroughly and store it in a cool, dry place away from direct sunlight and extreme temperatures. Use a trickle charger to maintain its charge over time.
- Engine Protection:
- Change Oil & Filter: Perform a fresh oil and oil filter change before storage to ensure clean oil is coating internal components.
- Spark Plug Hole Oil: Remove the spark plug(s) and pour a teaspoon of clean engine oil into the cylinder. Gently pull the recoil cord (or turn the engine over by hand if possible) a few times to distribute the oil, then reinstall the spark plug. This lubricates the cylinder walls and prevents rust.
- Physical Protection: Clean the exterior of the generator. Store it in a clean, dry, and well-ventilated environment. Use a breathable, waterproof cover to protect it from dust and moisture without trapping condensation.
- Tires (if mobile): If your generator is on wheels, block it up to take the weight off the tires and prevent flat spots.
Your Top Generator Questions, Answered
You've got questions, we've got answers. Here are some of the most common inquiries about 20 kW generator maintenance.
- What type of oil should I use for my 20 kW Cummins generator?
While high-quality 10W-30 is generally recommended for many climates, always consult your specific Cummins owner's manual. It will provide precise recommendations based on operating temperature ranges and specific engine requirements. Using the wrong oil can damage your engine. - How often should I run my generator to keep it healthy?
You should run your generator at least once a month for about 30 minutes. This "exercise run" helps to lubricate engine components, circulate fluids, keep the battery charged, and verify that all systems are functioning correctly. Ideally, run it under a small load. - Can I install my 20 kW generator myself?
No. Installation of a 20 kW standby generator should always be performed by a certified Cummins technician or a licensed electrician/contractor. This is due to the complexity of electrical and fuel connections, local building codes, and safety regulations. Improper installation can be dangerous and void your warranty. - My generator is running, but there's no power output. What's wrong?
First, check and reset any internal circuit breakers on the generator itself. If that doesn't resolve the issue, it could indicate a problem with the alternator, voltage regulator, or control board. These are complex electrical issues that typically require professional diagnosis and repair. - How long can a Cummins 20 kW generator run continuously?
Cummins 20 kW generators are designed for extended continuous operation during power outages, often rated for hundreds or even thousands of hours with proper maintenance. However, "continuous" doesn't mean "never turn off." Regular maintenance intervals (like oil changes) are critical for reliability over long periods. During an extended outage, it's wise to shut it down periodically (e.g., every 24-48 hours) for a brief inspection and to refuel safely.
The Bottom Line: Power, Preparedness, and Peace of Mind
Your 20 kW generator isn't just a machine; it's an essential part of your household or business infrastructure, a key player in ensuring your comfort, safety, and operational continuity. Treating it like the important appliance it is���with consistent maintenance, proactive troubleshooting, and advanced care—ensures it provides safe, reliable power precisely when you need it most.
Whether it’s a quick check of the oil, a meticulous filter change, or knowing when to call in a professional for a complex issue, every step you take contributes to its longevity and reliability. For truly in-depth, model-specific guidance, always consult your official Cummins user manual. And for a broader understanding of what these powerful units can do for you, check out your complete guide to 20 kW generators. Stay informed, stay prepared, and enjoy the peace of mind that comes with a well-maintained power source.